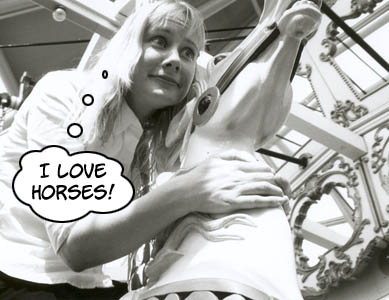
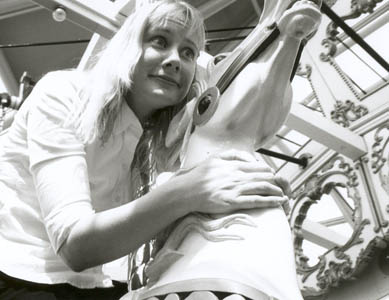
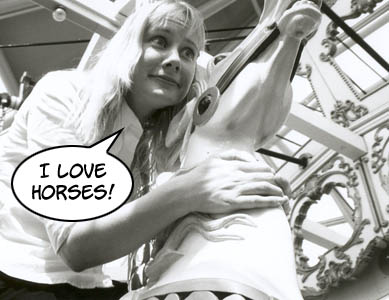
First, find a picture. I chose this one:
Place your text. It will automatically be on a new layer. Try to put it where it doesn’t cover anything important. If you’re looking for a comic-book font, you can find some good free ones at Blambot.

Create a new layer between the background and the text layer. Use the marquee tool to select an ellipse around your text (the marquee tool is the first tool in the toolbar. Click and hold the marquee button to switch to the elliptical tool.) Make sure to leave some breathing room for your words.
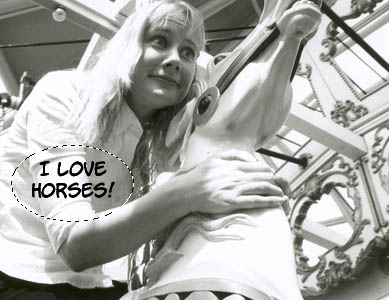
To add the “mouth pointer”: Click the polygonal lasso button (it’s right under the marquee button- you might have to click and hold to switch to it) .
HOLD DOWN SHIFT while you draw the triangle. Make it point at the speaker’s mouth, but don’t make it huge.
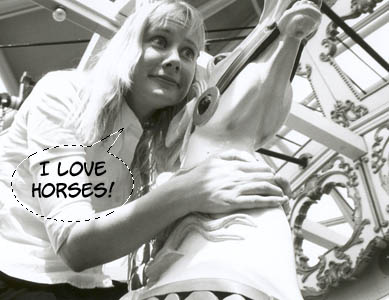
Fill the selection with black. You can use the paint bucket tool, or press Shift-F5 and use the fill menu.
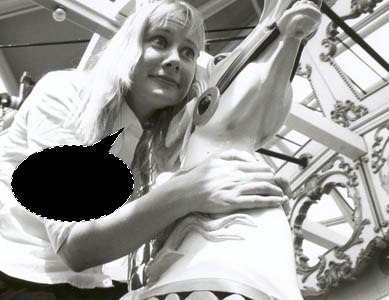
On the menu, click Select/Modify/Contract and choose 1 or 2 pixels. I like the thicker 2-pixel line, myself.

Fill again, this time with white:

…then deselect everything, go to the text layer,adjust the text so it’s centered properly, and you’re pretty much done!
You can use the same method to make thought balloons. Just use multiple ellipses to make the “thought cloud,” and use circles leading to the persons brain instead of a “mouth pointer.”